

Tech is AWESOME! When it works the way it’s supposed to, at least. We love tech for improving our productivity, keeping in touch with family & friends and just plain having fun. Unfortunately, tech isn’t perfect. It sometimes fails, and when it does, it’s usually at the most inopportune time. For those of us who use Apple hardware, those times or less frequent, but even then, it can be a pain to deal with.
Just like a mechanic has a set of hardware tools in his toolbox, I have a set of software tools that I use fairly often to help diagnose and troubleshoot when things go really wrong… that time when your computer just won’t boot. Since I love to share knowledge, I wanted to share these easy-to-use tools with you. So, without further introduction, here are 7 ways to boot your Mac when it’s having a bad day.
1) Recovery Mode
Since the days of OS X Lion in 2011, Apple has offered a way to install or reinstall your Operating System. This can prove to be very useful, but even more useful are the other tools that we have access to when we boot to Recovery Mode. We can also restore from a Time Machine backup, use Disk Utility (I spend a LOT of time here) and even search the web for additional help.
To boot into Recovery Mode, turn on your Mac. Immediately press and hold the Command + R keys, even once you see the Apple logo and hear the startup chime. Once you see the following screen, you can release the keys and begin troubleshooting.

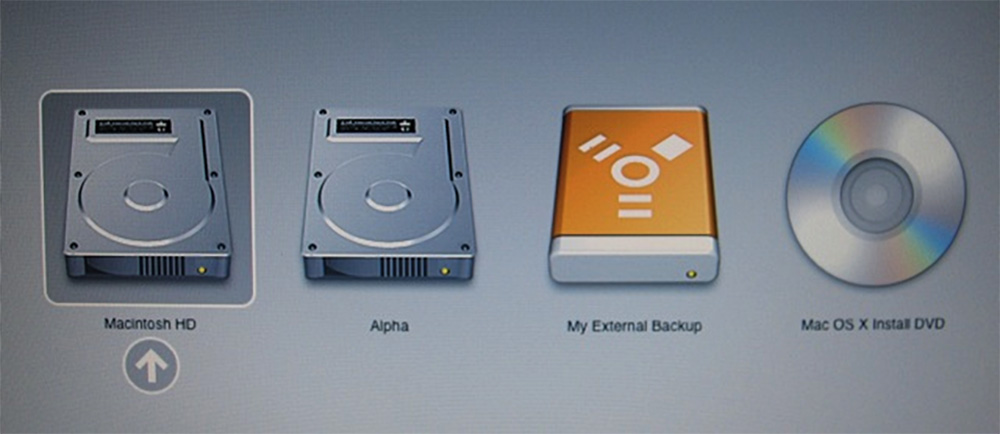
2) Startup Manager
The Boot Manager show you all bootable drives that are connected to your Mac at that particular time. For example, if you have a bootable thumb drive connected at the same time as your internal drive is still connected, it will give you the option to boot to either of those drives. This is particularly useful when you want to boot to an emergency boot drive on a thumb drive.
To boot to the Startup Manager, turn on your Mac. Immediately press and hold the Option key until you hear the startup chime. Upon release, you will be presented with a list of devices that you can boot to.
3) Safe Boot
Safe Boot is a method of booting to your default boot drive with one difference… OS X will only load device drivers that are absolutely necessary. Rather than loading the latest and greatest 3D video drivers, for example, you will get a basic video driver… just enough for you to work your way around (definitely not designed for gaming). This is especially useful if you are troubleshooting a potential driver issue. When used, Safe Boot will also perform a quick diagnostics of your hard drive.
To boot to Safe Mode, turn on your Mac. Immediately press and hold the Shift key as soon as you hear the startup chime. You will see a gray screen with a progress bar. Continue holding the Shift key until the progress bar disappears.

4) Reset PRAM
In some cases, it may be necessary to reset the PRAM (Parameter Random Access Memory). PRAM stores important system information such as hard drive IDs, screen resolution, speaker volume, etc. If this becomes corrupt, it could result in some funny system behavior that may be resolved by resetting the PRAM. It’s also recommended to reset your PRAM if you upgrade or swap out your hard drive.
To reset your PRAM, turn on your Mac. As soon as you hear the startup chime, press and hold the Command + Option + P + R keys (don’t get frustrated if you miss it the first time… just try again). At this point, your Mac will reboot. You can release the keys once you hear the Apple chime for the second time. Your Mac will continue booting as normal.
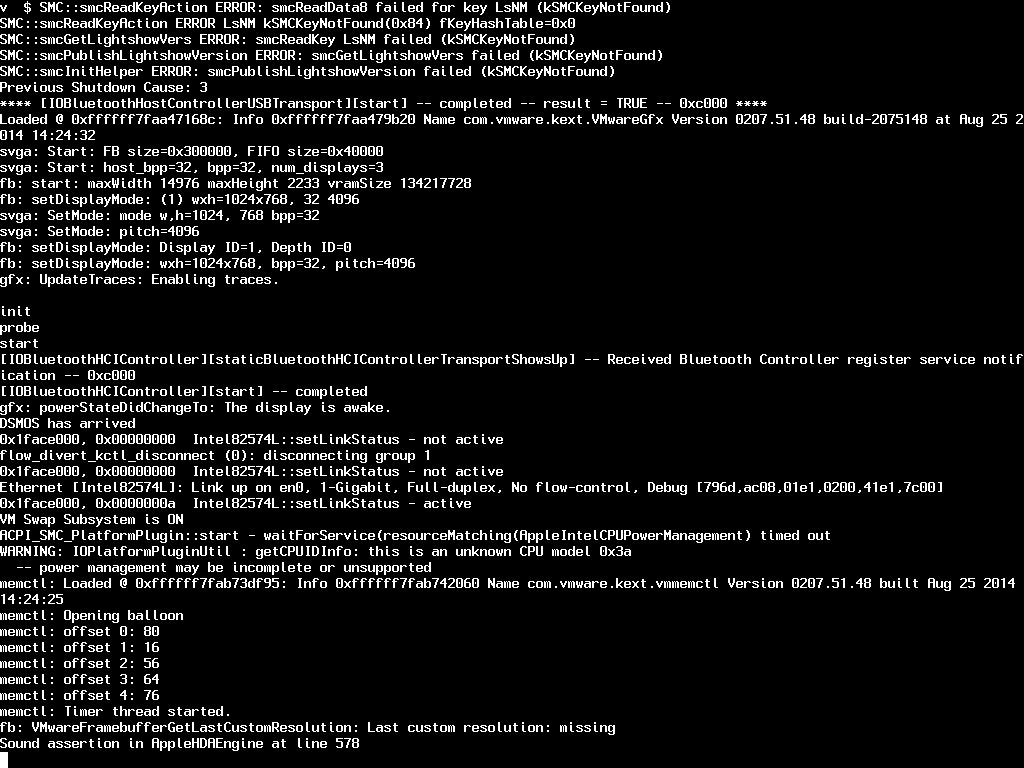
5) Verbose Mode
When you boot your Mac normally, there's a lot going on. Apple has been very kind by hiding most of that behind a gorgeous User Interface (quite frankly, most of us wouldn't know what we were looking at anyway!). For those of you who want to see exactly what's happening under the hood, there's Verbose Mode.
To boot into Verbose Mode, turn on your Mac. As soon as you hear the startup chime, press and hold the Command + V keys. Let the fun begin!
6) Single-User Mode
Single-User Mode is somewhat similar to Verbose mode with one glaring difference... instead of taking you to the familiar login Window, you will be left with a Terminal prompt. For those who know what to do at this point, the playground is yours. If you don't know what to do, I recommend not using this boot mode.
To boot into Single-User Mode, turn on your Mac, immediately holding down the Command + S keys. You can release the keys once you see a black screen with white text.
7) Enable Target Disk Mode
If all else fails and you simply want to connect to your Mac's internal hard drive as if it were an external hard drive, we have Target Disk Mode. This will give you full access to your Mac's hard drive from another Mac, connected via Thunderbolt or FireWire cable.
To use Target Disk Mode, turn on your Mac and hold down the T key as soon as you hear the startup chime. Keep holding until you see a white FireWire or Thunderbolt logo appear on the screen (depending on your Mac’s hardware capabilities). You can now directly connect your Mac to another Mac with a FireWire or Thunderbolt cable and access the first Mac’s drive. When you’re done, unmount the first Mac’s drive from the second Mac in OS X and press and hold the first Mac’s power button until the system powers off.


